
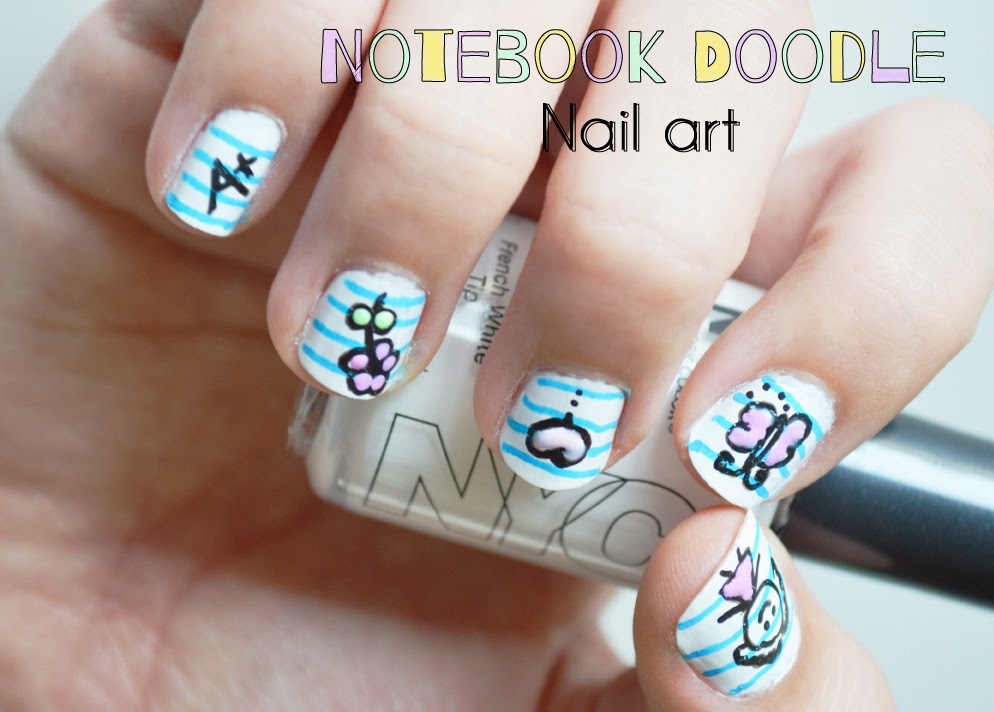
What better way to get ready for school than to doodle on your notebook nails? I love to doodle and it's not much different doodling with nail polish than it is with a pen and paper. I recently did this nail tutorial for a new publication I'm working with called Ella and Annie Magazine . We just released our first issue and it's packed full of back to school ideas, parties, articles, inspiration, crafts and recipes. Fun stuff.
I am not a professional manicurist or nail artist, so I apologize in advance for how messy these nails may look in comparison to a pro. However I love playing around with my girls nails. It started a couple of years ago when my daughter asked me to paint strawberries and watermelons on her nails. Strawberries and watermelons are one of the easiest things to start with for sure. I looked it up on pinterest of course and we did it first try. They were adorable and we were hooked. Since then we have done panda bears, hello kitty, tennis shoes, minions and puppy dogs to name a few. The possibilities are endless if you have the right tools and a little know how.
TOOLS...
White Nail Polish
Two to three pastel or neon colored Polish
Clear Polish for a top coat
Blue nail art pen
Black nail art pen
Small ball tipped nail art tool (or a toothpick)
A paper plate


STEP 1...
Apply a white base coat. You might have to apply two or three coats to make sure it's completely white with no streaks.

STEP 2...
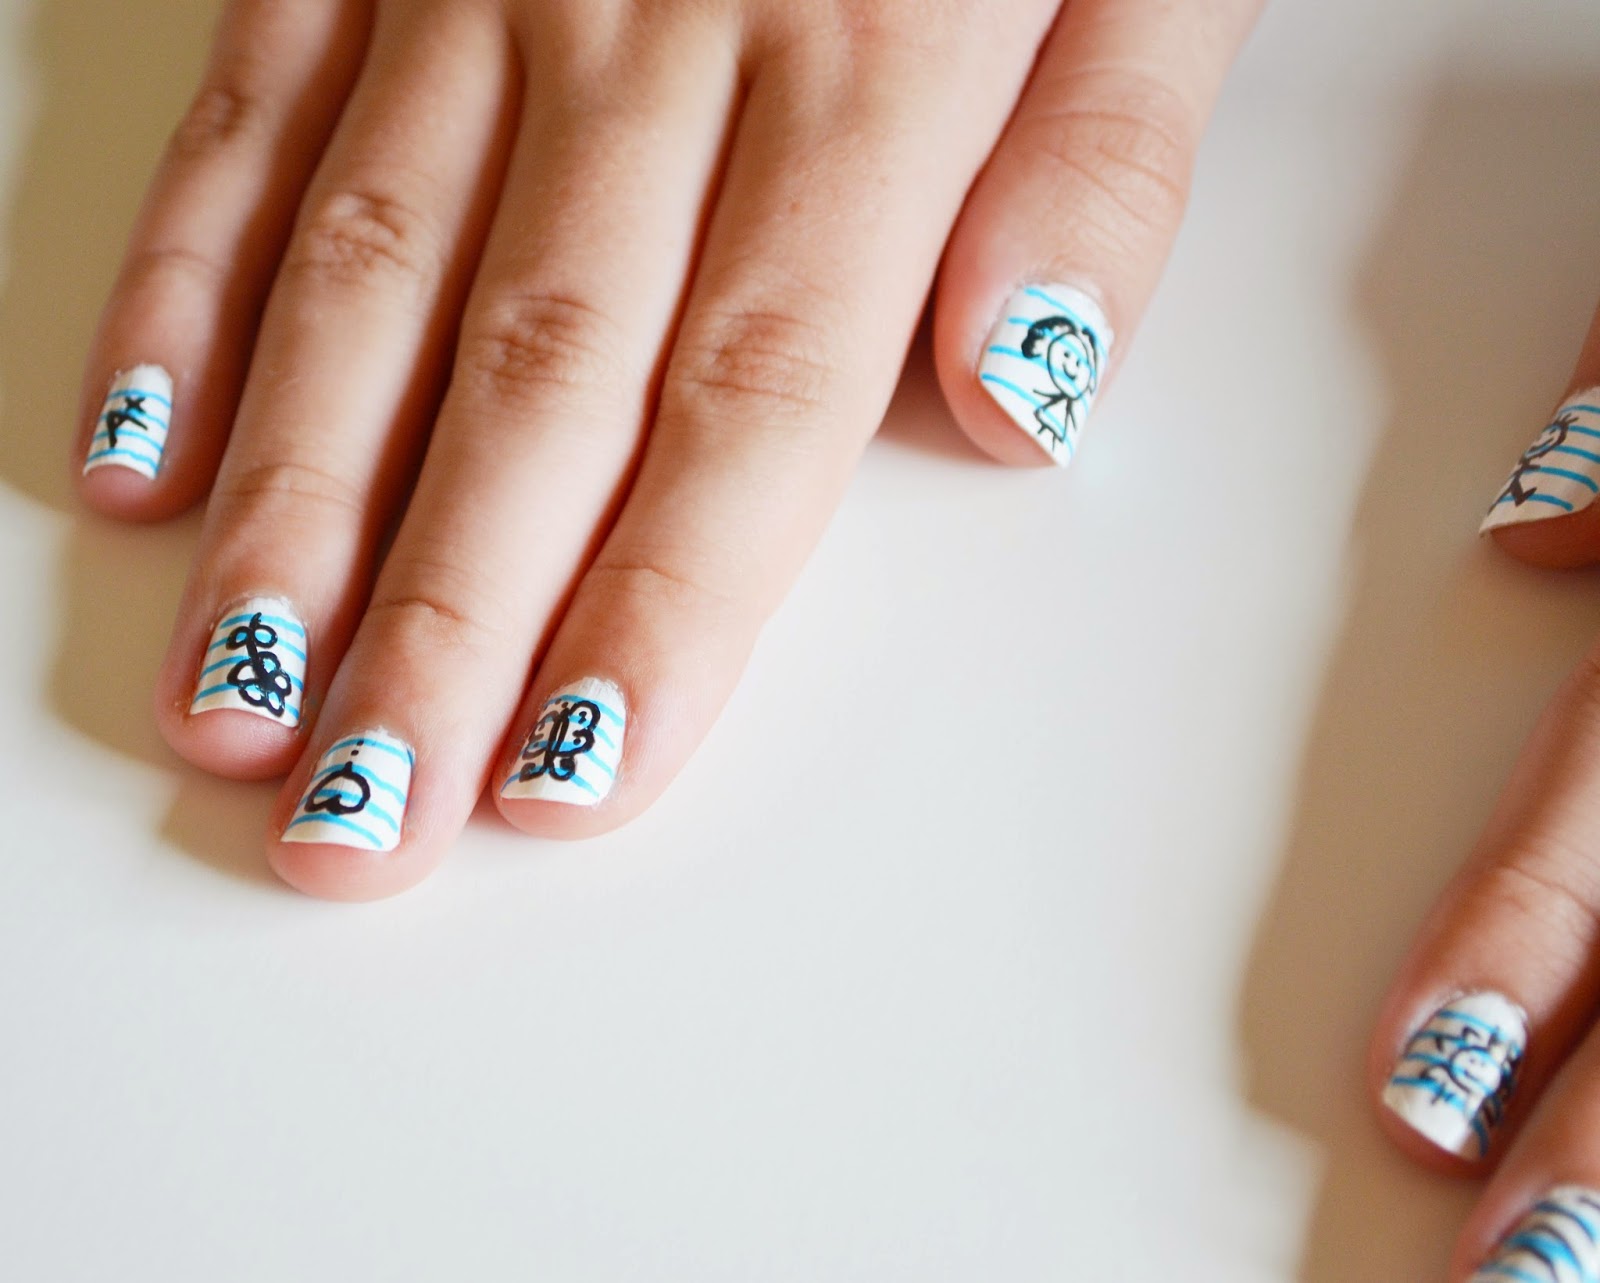
Once the white coat is dry, draw 3 to 4 stripes on each nail with the blue pen. (Don't look too close here or you'll see my not so steady lines.) The great thing is they don't have to be totally perfect because you're going to paint over most of it with the doodle art.


STEP 3...
The blue stripes will dry fast. Then using the black pen draw any sweet little doodles you want to on the nail. I let my daughter tell me what to put on each nail, but this is totally up to you. It could even be text on every nail or the same sweet picture doodled over and over again.
STEP 4...
Put small dabs of your colored polish onto a paper plate. Then using your nail art tool or toothpick apply the color to the open areas of your doodles. I just dipped the tool and then dabbed the color on. It's a small space so you don't need much.


STEP 5...
Once the colors are dry apply a clear top coat to protect your adorable artwork. Then you're done. I love happy nails:)


ENJOY !
Credits:
Nail art by Sunny Duran
Nail Polish, Nail art pens, nail art tools Walmart
Adorable design! :)
ReplyDelete